Read and Write using ThingSpeak
In this post, I will be doing a simple IoT project using ThingSpeak.
Read and Write using ThingSpeak
Components:
Hardware Part:
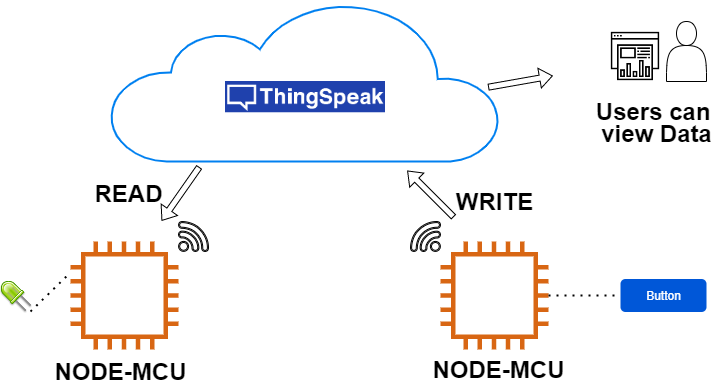
You can set the circuit as shown in the figure above
Here I have used 2 different boards make sure you name them as Read and Write separately
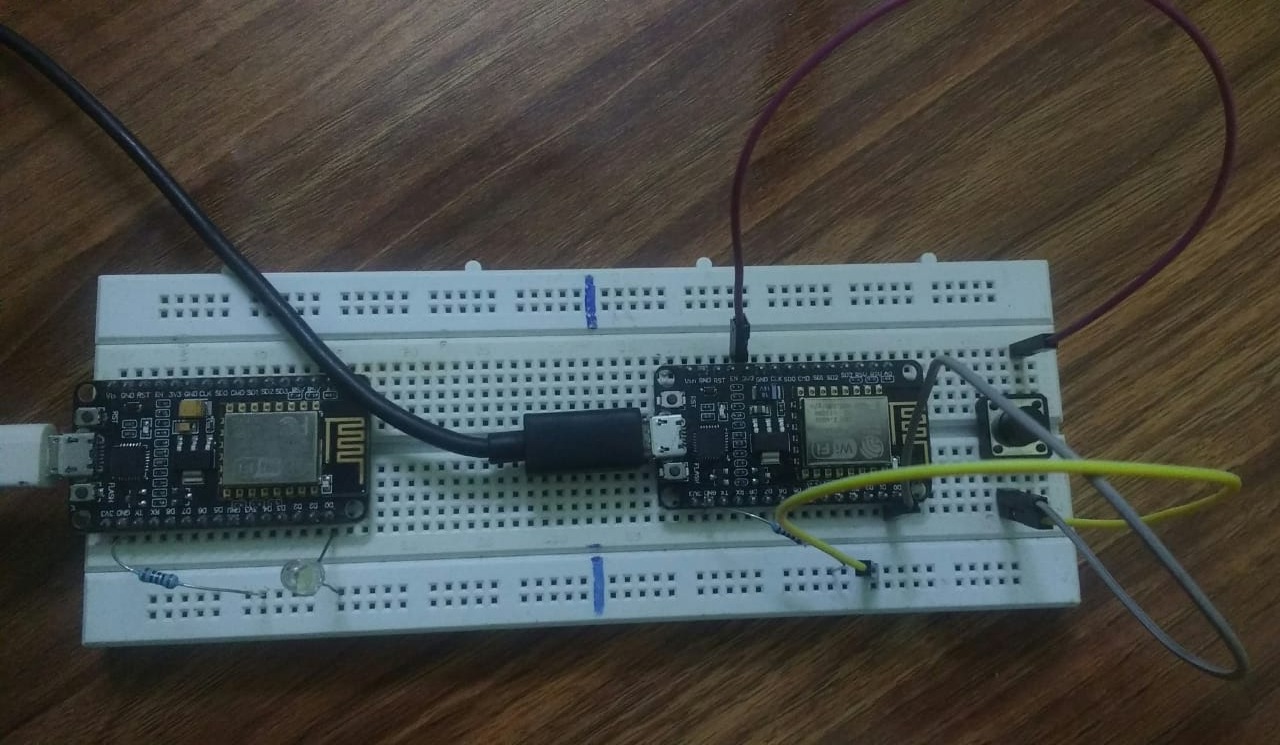 circuit
Software Part:
In this project, I used the Arduino IDE for programming NODE-MCU.
I have written 2 separate code files
This is the code for Node-MCU with LED here
This is the code for Node-MCU with button here
You can view the dashboard here
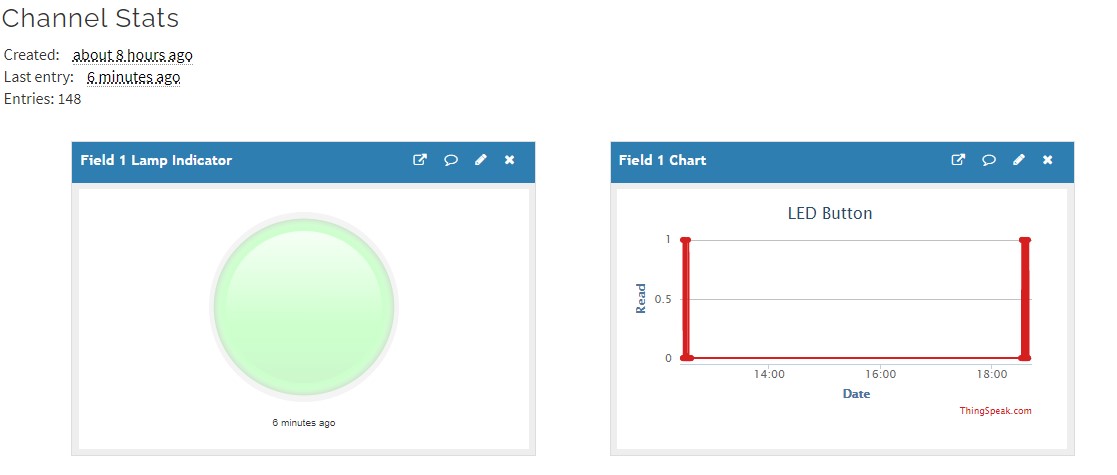 Dashboard
That’s it for now..
This post is licensed under CC BY 4.0 by the author.